Recently, I did a Snowplow Analytics implementation via the Relay42 tag management system. The setup I chose for this is very neat (if I can say so myself), so I’m sharing it here, hoping it can help or inspire others.
(This is probably a rare combination of tools, so this post will not be the most read on this blog, but whatever. Welcome, reader!)
Pulling apart the Snowplow tag
The snowplow tag consists of several bits:
- loading the script
- creating the tracker + setting some variables
- send an event: most often is that tracking a page view
For my setup, I decided to put part 3 (the track page view) in a seperate Relay42 tag with lower priority, for reasons I’ll explain later.
Before loading the first bit of the snowplow tag, I’m gathering some meta-information.
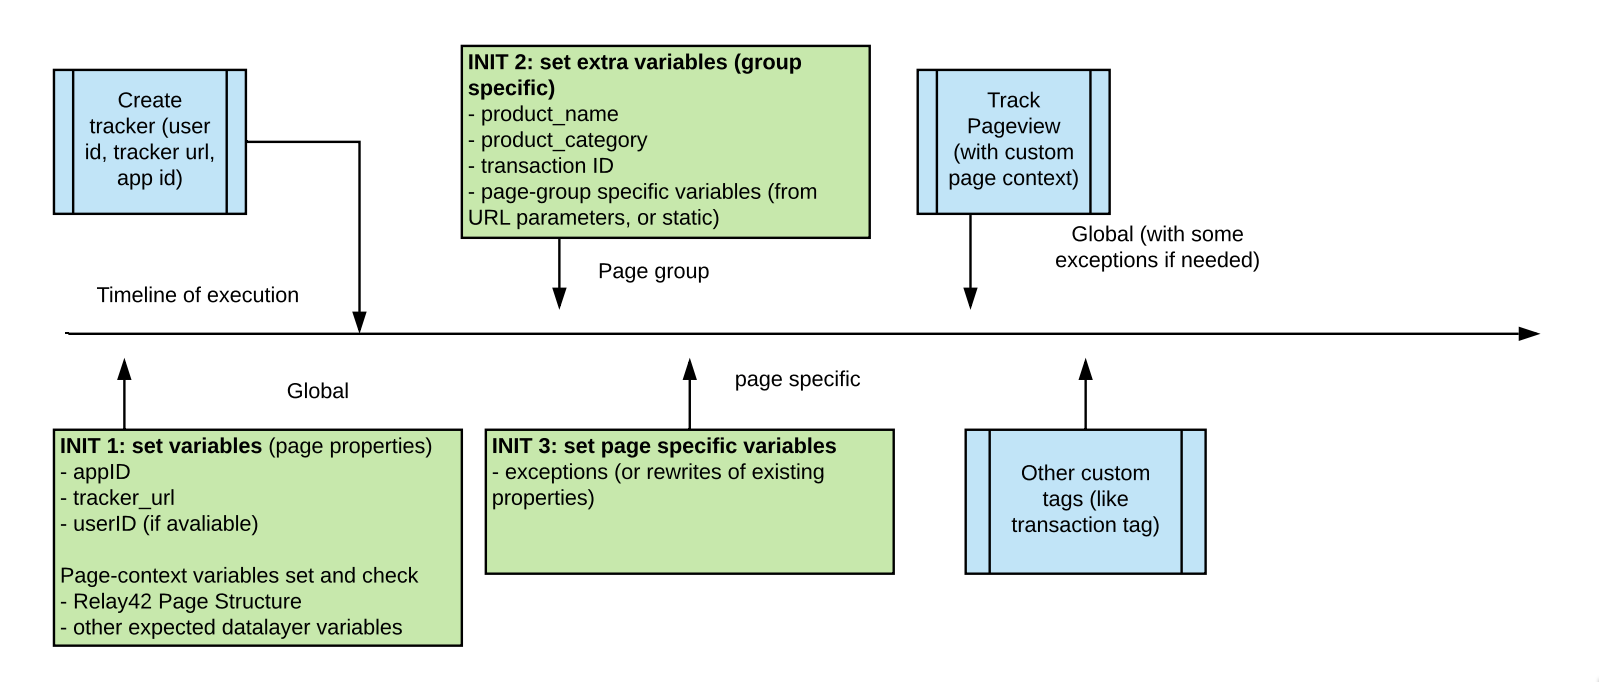
Tag priority setup
- Relay42: set some “global” configuration variables (site-wide)
- Snowplow Tag: create tracker using the variables (site-wide)
- Relay42: set (or override) some page-specific configuration variables (using page groups)
- Relay42: set some super-page-specific configuration variables (using individual pages)
- Snowplow Tag: send pageview, using the custom page context set in the variables
- Snowplow Tag: send other events (like transactions)
So the final configuration looks something like this:
In the INIT 1 variable setting bit, the snowplow endpoint is determined and the application name is set.
Normally, these variables are the same across the site, but not always.
- sometimes you want to run in debug mode to test tags
- you might want to always use a different application name for your dev/acc environment (via a rule)
Tag example code

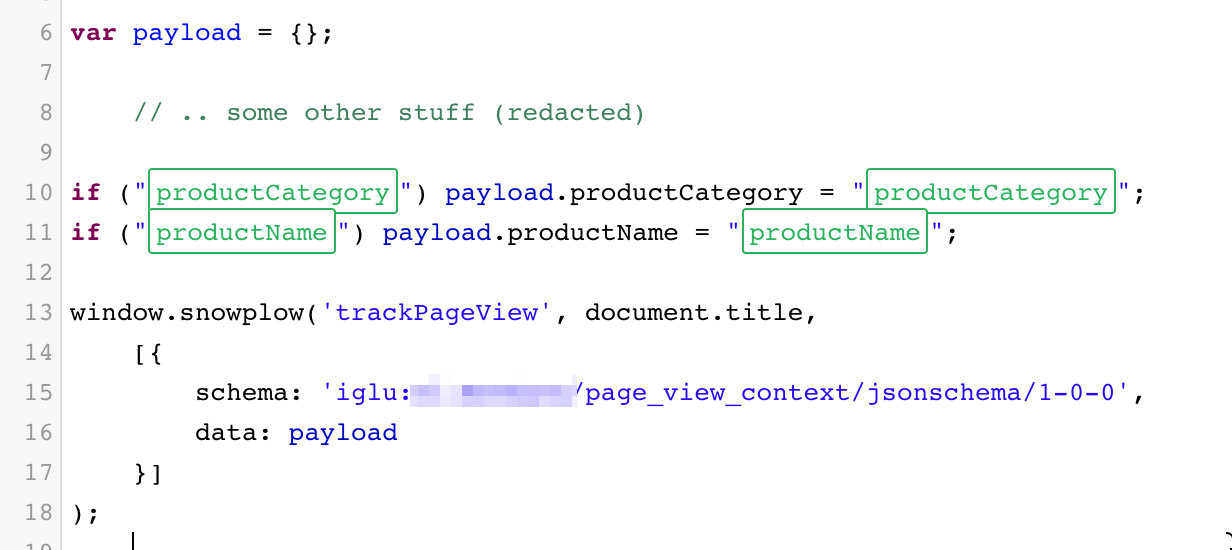
Regarding page groups and special cases, I used the following setup:
- create page group per product funnel, with all pages in them
- in these group, create an INIT 2 tag which sets the product name and other product specific variables
- create a page group for all conversion pages (transactions) which uses the variables from INIT2, and fire a custom transaction event (but only after the page view tag)
Pretty clean, right?
If you find this post useful, or if you have anything to add, please ping me in a comment or shoot me a tweet @zjuul.
Happy tagging!


Leave a Reply